


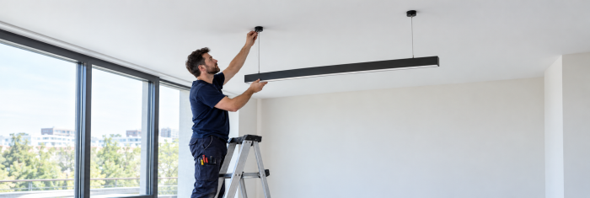
Are you planning to install LED pendant lights or connect several fittings to create a continuous line of light? Good preparation prevents you from discovering that a power cable or connector is missing during installation.
This guide helps you prepare, suspend and connect Ledvion pendant lights with a fixed colour temperature and linkable pendant lights with a CCT switch.
The two versions differ mainly in how effectively they limit glare. This helps determine which spaces they can be used in:
Pendant lights with a fixed colour temperature: individual fittings with a fixed colour temperature of 4000K and a stated UGR<25. This version is not intended for workplaces where a UGR limit of 19 applies. Possible applications include certain corridors and storage rooms, depending on the activities carried out. These fittings cannot be linked together and each requires its own power connection.
Linkable pendant lights with a CCT switch: fittings with a stated UGR<19, which can be considered for offices and workstations with display screens, among other applications. You can also choose between three colour temperatures and create continuous lines of light using a compatible metal quick connector.
Unsure which version suits your space? Our blog “Which linear lighting suits your space?” explains the differences in UGR rating, colour temperature and mounting options.
Have installation and electrical connection carried out by a qualified electrician. Both versions must be connected to protective earth. Use this guide to prepare for installation and always follow the product-specific installation instructions.
The installation consists of the pendant light, the suspension kit and a suitable power connection. The driver is already built into the fitting.
Prepare a tape measure, pencil, spirit level, drill, screwdriver and suitable testing equipment.
Component | Fixed colour temperature version | Linkable version |
|---|---|---|
Suspension kit | Two 1.5-metre suspension cables included | Two 1.5-metre suspension cables included |
AC power cable | Available separately in black and white | Available separately in black and white |
Metal quick connector | Not applicable | Available separately; one per joint |
Wall mounting brackets |
Check that all components are present and undamaged. For individually sold fittings, the power cable is available separately. If purchasing a bundle, check which components are included and whether your connection requires additional accessories.
Use screws and wall plugs suitable for the ceiling and the weight of the fittings.
Both versions have an IP20 rating and are intended for dry indoor spaces. Observe the safety clearances specified in the installation instructions.
Isolate the relevant circuit and prevent anyone from switching it back on during the work. Have the electrician verify that the connection is dead.
Use the lighting plan to determine where the pendant lights should be installed. A lighting plan shows which fittings are needed, where they should be positioned and how much light they will provide at the required locations. A lighting adviser, lighting designer or installation company experienced in lighting calculations can prepare one for you.
Before installation, check:
The ceiling’s load-bearing capacity and suitable fixing points.
The location of the power supply and the required cable length.
The desired suspension height and clearance around the fitting.
The viewing direction and activities carried out beneath the lighting.
For a continuous line: the positions of joints and suspension points.
Suspension height and viewing direction affect visual comfort. Pay particular attention to this above workstations.
Measure the fixing points on the actual fitting before drilling. The nominal length of 1.2 or 1.5 metres is not the drilling distance.
Secure the two suspension points firmly to the ceiling and install the suspension cables. Attach them to the pendant light using the corresponding fixing components.
Adjust both cables so that the fitting hangs level. Check that all fixings are secure and that the power cable is not under tension.
The 1.5-metre suspension cables can be adjusted to the desired height. Adjust or shorten them only as specified in the suspension system instructions. Do not modify the fitting’s housing.
Never use the power cable to support the fitting.
The linkable version has a CCT switch for selecting the colour temperature:
3000K: warm white light.
4000K: neutral white light.
6500K: cool white light.
Set the colour temperature while the power is switched off. Use the same setting throughout a continuous line for a uniform appearance.
The fixed version has a colour temperature of 4000K and no CCT switch. Neither version is dimmable: the CCT switch changes only the colour temperature.
Have the electrician check the supply voltage on the rating plate and use the designated connection.
The pendant lights operate on 220–240V AC. The driver is built in, so a separate driver is not required.
Terminal | Function | Typical conductor colour* |
|---|---|---|
L | Live | Brown |
N | Neutral | Blue |
PE or earth symbol | Protective earth | Green/yellow |
Always follow the terminal markings and installation instructions. Conductor colours alone are not sufficient to identify a conductor’s function.
Have live, neutral and protective earth connected to the corresponding marked terminals.
Check that the connections and cable restraint are secure. No bare copper should be exposed, and conductors must not be trapped or routed against sharp edges.
Close the connection compartment before switching on the power.
Only the linkable version is suitable for creating a continuous line of light. Use the compatible metal quick connector.
Observe the following maximum quantities per continuous line:
Twelve fittings of the nominal 1.2-metre version.
Seven fittings of the nominal 1.5-metre version.
Have the electrician link the fittings with the power isolated and in accordance with the installation instructions. This involves fitting the connecting components, aligning the fittings and connecting the internal plugs.
Then check that:
The joints are secure.
The connection compartments are closed.
No conductors are trapped.
Each fitting is adequately supported.
The total load is suitable for the power supply and circuit protection.
An electrical connection is not a suspension point. The fixed colour temperature version must not be linked using this system.
Separate wall mounting brackets in black and white are available for the linkable version.
Secure the brackets to a suitable wall and mount the fitting according to the installation instructions. Measure the fixing points on the actual assembly before drilling.
Have the power connected as described in step 5 and maintain the specified clearances and safety distances.
Before switching on, check:
All fixings and suspension points.
The cable restraints and closed connection compartments.
The protective earth connection.
For a continuous line: the joints and maximum number of fittings.
For the linkable version: the selected CCT settings.
Have the electrician carry out the necessary electrical checks and then restore power. Check that all pendant lights work and have the desired colour temperature.
Is something not working correctly? Switch off the power again before having the cause investigated.
Have installation and connection carried out by a qualified electrician. Work with the power isolated, connect protective earth and use the fittings only in dry indoor spaces.
Keep heat dissipation unobstructed and do not use damaged fittings or cables. Do not modify the housing, and use only the designated linking system for a continuous line of light.
Switch off the power before cleaning the fittings and do not use aggressive cleaning agents. The LED light source is not replaceable; replace the fitting at the end of its service life.

Not applicable |
Available separately in black and white |
Power supply | 220–240V AC, 50/60Hz | 220–240V AC, 50/60Hz |
Colour temperature | Fixed 4000K | 3000K, 4000K or 6500K via CCT switch |


